Blog

Choosing Between CNC Milling and CNC Lathe

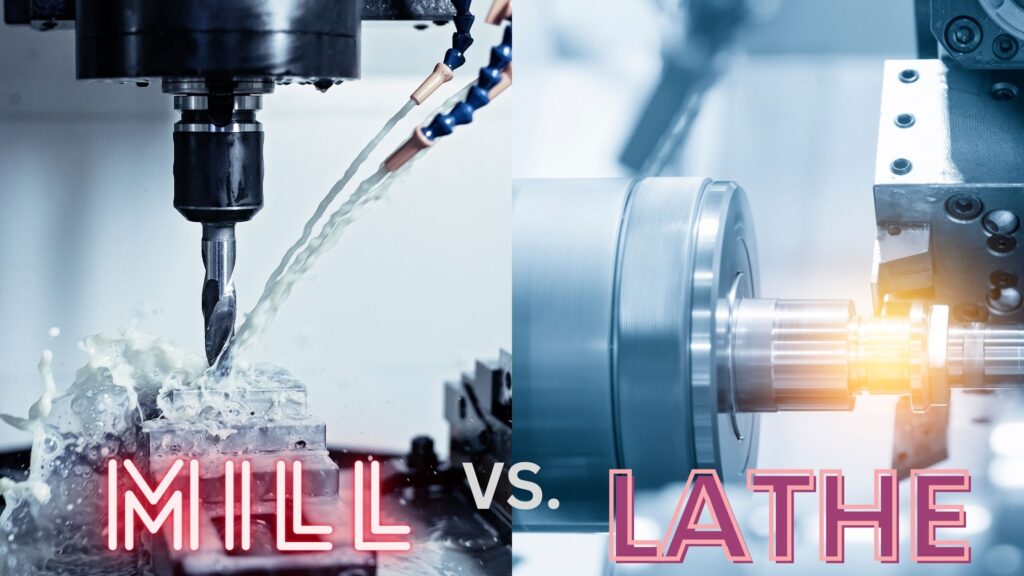
In the world of modern manufacturing, Computer Numerical Control (CNC) technology has revolutionized the way complex parts are fabricated. CNC machines, including mills and lathes, offer precise and efficient solutions for various manufacturing needs. But when do you choose a CNC mill, and when is a CNC lathe the better option? Let’s dive into the numbers to help you make an informed decision.

1. Complexity of Geometry:
CNC Mill: When the part’s design involves intricate shapes, pockets, slots, and 3D contours, a CNC mill shines. It excels at producing complex geometric features thanks to its multi-axis movement capabilities.

CNC Lathe: If your part primarily features rotational symmetry and is cylindrical or conical in shape, a CNC lathe is the way to go. It’s particularly efficient for producing shafts, threads, and other revolving components.

2. Dimensional Precision:
CNC Mill: Need high accuracy across multiple dimensions? A CNC mill offers exceptional dimensional precision. It can achieve tight tolerances and produce parts with intricate details.

CNC Lathe: When dimensional precision is crucial along the rotational axis, a CNC lathe delivers excellent results. It’s ideal for achieving precise diameters and lengths.

3. Material Removal Rate:
CNC Mill: If your priority is to remove a substantial amount of material quickly, a CNC mill is the better choice. Its cutting tools can rapidly carve out material from a solid block, making it efficient for bulk material removal.

CNC Lathe: While not as quick at material removal as a mill, a lathe is great for achieving smooth finishes on rotating parts. It’s particularly useful when maintaining a consistent diameter or achieving a mirror-like surface finish.

4. Tooling Costs:
CNC Mill: The versatility of a mill often requires a broader range of cutting tools, which can lead to higher initial tooling costs. However, these tools can be used for various projects.

CNC Lathe: Tooling costs for lathes can be lower, as the primary tools required are turning tools and a few others for specific tasks. This can make lathe operations more cost-effective for certain applications.

5. Setup Complexity:
CNC Mill: Setups can be more intricate due to the need to secure the workpiece and ensure proper alignment along multiple axes. This complexity might increase production lead times.

CNC Lathe: Setup for a lathe is generally simpler, as the workpiece is often clamped once and rotated. This streamlined setup process can lead to quicker turnaround times.

6. Batch Size:
CNC Mill: For smaller production runs and prototyping, a CNC mill is advantageous. It allows for quick adjustments and accommodates different part designs without significant setup changes.

CNC Lathe: When dealing with larger production quantities of symmetrical parts, a CNC lathe’s ability to replicate the same operation on multiple workpieces efficiently can save time and effort.

7. Versatility:
CNC Mill: The ability to work on a wide range of materials, including metals, plastics, and composites, makes CNC mills versatile for various industries.

CNC Lathe: While lathes also handle multiple materials, they excel at machining materials with rotational symmetry, making them essential for industries like automotive and aerospace.

Conclusion:
In the world of CNC machining, both mills and lathes offer unique advantages that cater to different manufacturing needs. The decision between using a CNC mill or a CNC lathe depends on factors such as part geometry, dimensional precision, material removal rate, tooling costs, setup complexity, batch size, and versatility.

By considering these numeric factors alongside your specific project requirements, you can make an informed choice that leads to efficient production and high-quality parts. Whether it’s the intricate contours of a CNC mill or the rotational precision of a CNC lathe, the numbers will guide you to the right decision.

Efficient Production Scheduling with AI A Tutorial with GPT 4

In this video, I’ll walk you through how we used OpenAI’s GPT-4 model to create an efficient and fair production schedule for a team of four employees. This tutorial will guide you through balancing work hours, rotating tasks, and maximizing team member skills to optimize your manufacturing process.

At Gemba Automation, we specialize in leveraging AI to reduce scheduling waste and optimize your production process. Visit our website at https://www.gembaautomation.com to see how our services can help streamline your operations and increase productivity.

Shaft Design Explained: A Comprehensive Guide for Mechanical Engineers

Join us at Gemba Automation as we delve into the complex world of shaft design in this comprehensive guide. From bending loads to gears and keyways, we leave no stone unturned. Whether you’re a mechanical engineering student or a seasoned engineer looking to brush up on fundamentals, this video is for you. Visit our website at www.gembaautomation.com for more insights.

Gear Up Design Principles for Mechanical Enthusiasts

Delve deep into the intricacies of gear design with this comprehensive guide brought to you by Gemba Automation. From foundational formulas to crucial design considerations, we explore how to create gears that are not only efficient but also resilient. Whether you’re designing for the delicate tick of a clock or the robust needs of a car transmission, understanding the fundamentals is key. Join us as we uncover the science and art behind gears, and discover how our expertise at Gemba Automation can elevate your mechanical engineering projects. For more information on our services, visit gembaautomation.com.

 “Manufacturing Unscripted” Podcast Appearance

Catch an enlightening episode on “Manufacturing Unscripted” where the spotlight’s on Mit Vyas, the Managing Director of Gemba Automation.

In this episode, learn about Gemba Automation’s transformative journey in the manufacturing industry. They’re not just a business; they’re a movement, leading with innovative solutions and groundbreaking technologies. Mit delves into the core ethos of Gemba, showcasing how they boost operations and set new standards for industry efficiency.

But there’s more. The hosts, along with Mit, journey into the world of lean manufacturing. Discover how this principle, focused on waste elimination and performance optimization, is sculpting the future of manufacturing, promising more for less.

Digital manufacturing also takes center stage. Mit sheds light on its evolution, emphasizing how blending digital prowess with traditional processes is not just the future—it’s the present.

Mastering CNC Machining: 3 Design for Manufacturing Tips Using Autodesk Inventor

CNC machining is a vital aspect of modern manufacturing processes. It allows us to create intricate and precise components with ease and efficiency. However, designing parts for CNC machining can pose a set of unique challenges. Understanding these challenges and how to overcome them can greatly streamline your design and manufacturing process.

In our latest video tutorial, we delve into the world of CNC machining with Autodesk Inventor, sharing three crucial Design for Manufacturing tips. Whether you’re a CNC novice or a seasoned professional, these insights will help you make your CNC machining process more efficient and cost-effective.

Tip 1: Minimize Complexities

While CNC machining is versatile and capable of producing a wide range of designs, it’s important to avoid unnecessary complexity. Overly complex designs can lead to longer machining times and increased costs. During the design phase, critically analyze your part and remove any ornamental features or overly complex geometries that don’t contribute to its function.

Tip 2: Design with the Machining Process in Mind

When designing your part, it’s crucial to keep the capabilities of your CNC machine and tools in mind. Certain features, like sharp internal corners, can be difficult to machine due to the rounded tip of most CNC cutting tools. Consider such limitations during the design phase and modify your design accordingly.

Tip 3: Consider Tolerances

Tolerances, the allowable variation for each dimension, play a critical role in the manufacturability of a part. Setting tolerances that are too tight can increase the cost and time required to manufacture a part. Always strive to specify tolerances that are as loose as possible, but still functional for your part.

Incorporating these tips into your design process can result in parts that are not only easier and cheaper to manufacture but also fulfill their intended functions efficiently and effectively.

If you’re looking for a step-by-step guide to applying these tips in Autodesk Inventor, look no further. Check out our latest video tutorial where we walk you through these strategies in real time, using practical examples.

At Gemba Automation, we’re committed to providing valuable insights to help you optimize your design and manufacturing processes. For more tips and tutorials, don’t forget to visit our blog regularly and subscribe to our YouTube channel.

Do you need professional help with your automation needs? Don’t hesitate to contact us at sales@gembaautomation.com or call us at 562-685-7545. We’re here to help!

Burrboy – Deburring Vibratory Tumbler

Key Points to design:


1. Deburring vibration is separate from mounting base allowing operator to place unit on desired work location.


2. Sound is designed to be less than round 75 decibels.


3. Molecular cross-linked material to ensure long term use of unit.


4. Removable barrel to allow operator to have multiple media types.


5. Length = 14″ | Width = 22″| Height = 21″| Weight = 35 Lbs | Capacity = 0.5 Ft2

For more information: https://gembaautomation.com/burrboy/ sales@gembaautomation.com

(562) 685-7545

CNC Programming: Blue Collar vs. White Collar Tasks

By Mit Vyas

With the rise of the digital revolution, many elements of traditional manufacturing professions can be separated from the operator and performed more effectively elsewhere. During this article, I will explore how automation applies to both blue collar and white collar roles in CNC Manufacturing. 

Step 1: The Great Separation

Many jobs previously involved a blue collar labor component in addition to a white collar documentation component. The digital revolution is creating a clear separation between these two types of tasks. 

Let’s take a look at the profession of CNC machinists. Traditionally, a CNC machinist was required to create code and run the machine. Now with the rise of digital tools, there are many tasks related to running a CNC machine that someone else can do more effectively than the machine operator. CNC machinists can focus on operating the machine and other tasks that require their physical presence.

For an example of this separation, consider the Uber ridesharing platform. Before Uber, taxi drivers had to invest time and effort into finding areas of high demand, and they didn’t always succeed. Now, the Uber algorithm connects drivers with nearby riders, and drivers can just focus on driving. 

Step 2: The Great Consolidation

Due to the rise of the internet, companies can find the most skilled digital contractors to help with their projects. Instead of just selecting from their limited local pool of workers, companies can work with the most qualified people for the job with the best set of tools at their disposal. 

Now, manufacturing work is consolidated and performed by a few of the most qualified people. A programmer that is very skilled in CNC Swiss machines, for example, can provide the G-code to many different CNC Swiss machines around the world without having to be physically present at any of them.

Step 3: The Great Execution 

Not every aspect of manufacturing can be done remotely, though. While G-code can be created from anywhere, an operator must still validate G-code in person on the production floor. Luckily, there are many virtual conferencing tools and simulators that can be used to facilitate the validation of G-code by a remote programmer. 

The following are steps for a hybrid approach to onsite and offsite G-code validation:

  • First, an onsite operator performs a dry run to see if any tools crash, or if there are errors in the G-code. This process can easily be videotaped and validated offsite by the programmer. 
  • Second, the operator performs a physical run on scrap parts. They can take pictures of the part quality and send them to the programmer virtually to validate that the geometry is correct. 
  • Finally, the operator cuts a production part to validate that it is up to customer requirements. Part quality can be validated by the programmer offsite through photos or 3D scanning software.

Conclusion

The world of manufacturing will look different in the next few years. Digital manufacturing creates a network effect where problem-solving can occur at one site, and solutions can spread globally. For an industry known for sharing its best practices at trade shows, this is a drastic change in thinking. Companies that can take advantage of the global manufacturing network will have a major advantage in the future.